Last year I had the idea of wrapping gifts in ice and decided this was the year to try it out. The concept is simple enough. I just wasn’t sure how straightforward the execution would be.
The Kinks
I tried to work out as many kinks as possible during the planning stage. And one thing I knew I wanted was clear ice. My research revealed there are many factors that come into play in creating clear ice. There are tons of articles out there about how to go about this, so I won’t go into detail here. I kept it simple and went with the double boil method using tap water. Realizing that wouldn’t give me top notch results, it offered the easiest method and did give decent results.
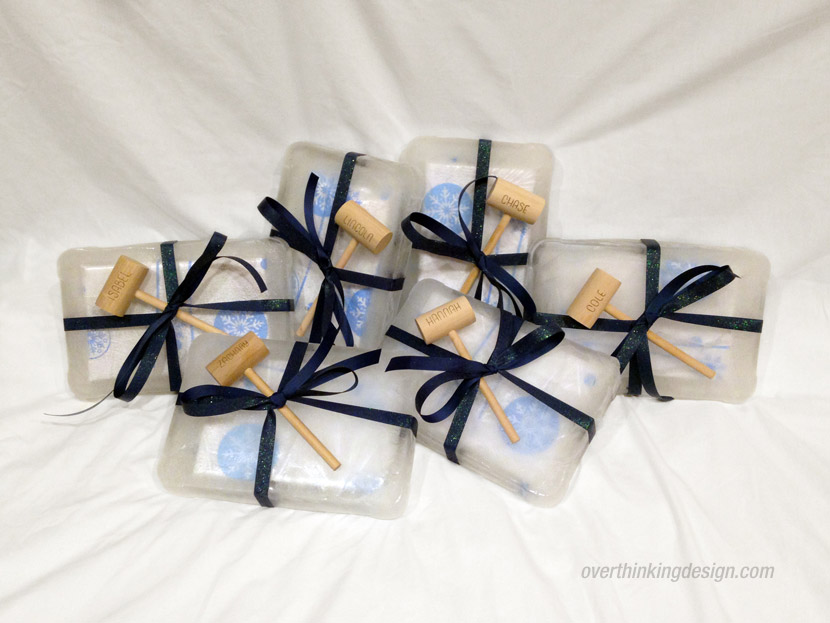
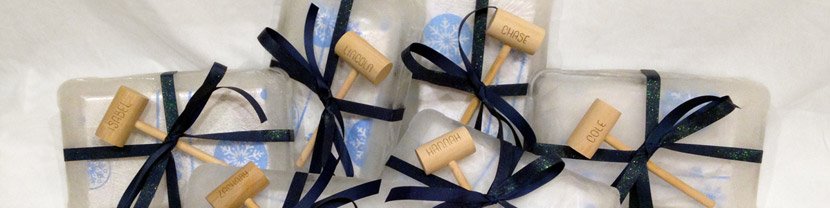
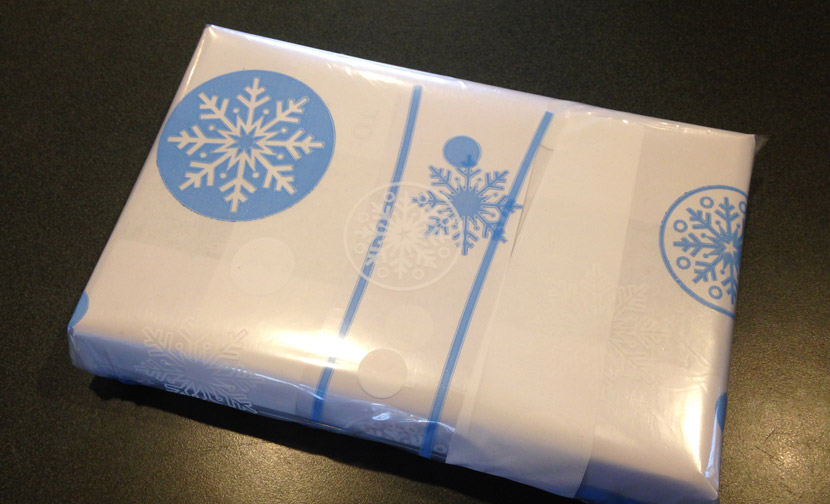
My next hurdle was how to protect the gifts from the water. My goal here was not to create an ice box that the gift would be placed into. I wanted the gifts truly encased in ice and that meant placing the gifts in water that would freeze around them. Gifts were first wrapped in paper in order to conceal them, then placed into a freezer bag that was tightly wrapped around the gift. Packing tape was placed over the entire locking strip of the freezer bag to assure water would stay out. All of that was then placed into a second freezer bag which was again sealed with packing tape. I used freezer bags that had blue snowflakes printed on them, knowing the snowflakes would show through the ice. And I’ll tell you now that the freezer bag method worked fine. I had zero leaks.
The Test
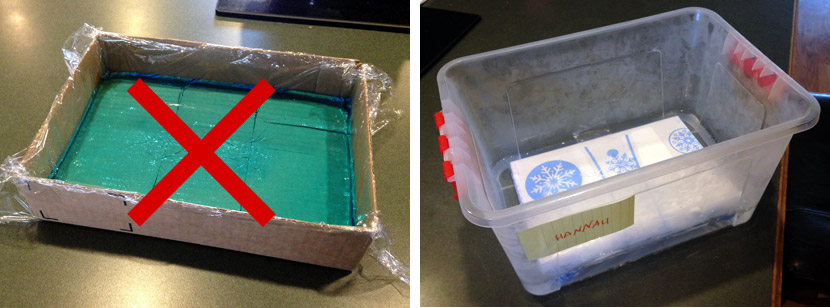
In what container was the freezing going to happen? I started out by lining the perfect-sized cardboard box with plastic wrap and pouring in water. I did a test freeze and the results were not good. The plastic wrap wrinkled throughout the process and even minor wrinkles made it hard to separate the plastic from the ice. Plus the ice itself was rough and the corners especially did not look attractive. I realize the fun of this gift wrapping is the novelty of the ice, but still, I want them to look nice.
There were two more problems that came to light during this first test. I had added blue food coloring to the water for a fun effect. However the food coloring did not freeze along with the water. It separated from the water and sat on top of the ice. As I handled the ice, my fingers turned blue. The food coloring was a mess and had to be eliminated.
Secondly, I added glitter to the water. I envisioned glitter being captured throughout the ice block. Not so. Glitter floats. I just ended up with an awkward layer of glitter atop the ice. And the glitter pieces clumped together. The glitter had to go.
My second test went much better. I found a plastic container that was the perfect size for each of my gifts. I could do the freezing in there without worrying about wrinkled, flimsy plastic wrap. Each of my gifts were the same dimensions. This was purposeful as I didn’t want to find different sized containers. One size fit all. And I wanted the gifts to be fairly easily opened. I did not want a huge chunk of ice. So my container was larger than the dimensions of my gifts, but not by a lot.
The Freeze
And the final big challenge was how to fully submerge the gifts into the water—because they float. And if you weigh or push them down, those objects will be encased as well. In the end I realized I didn’t need to submerge them at all. I placed the gift in the plastic box, then added water until it started floating. I then used tape to assure the gifts stayed centered within the box—not touching any side. And into the freezer it went. When that chunk was frozen solid, I flipped it over and added water until everything floated once again. I made sure there were no bubbles trapped under the top layer of ice and then placed it back in the freezer. The encasing was then complete.
The Finishing Touches
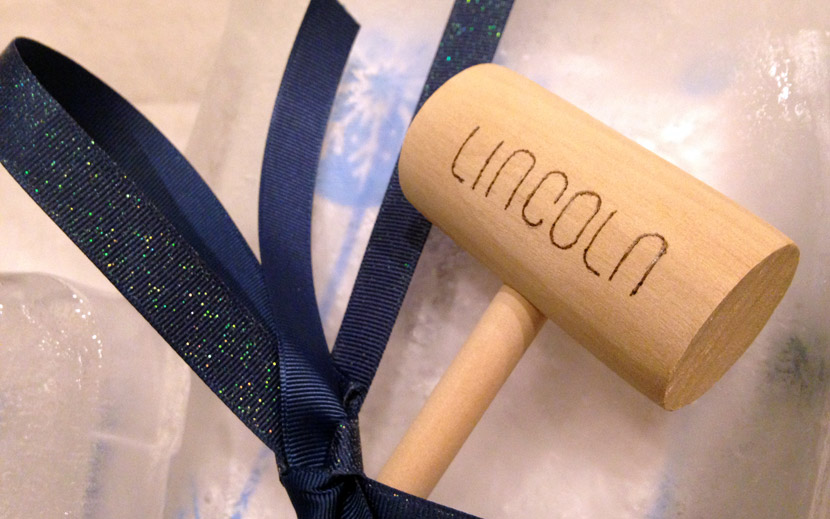
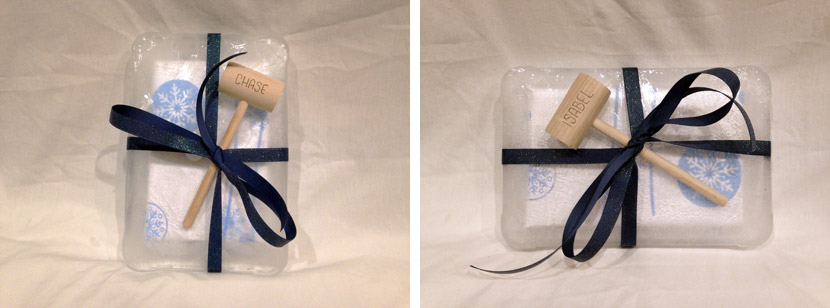
Now came the finishing touches. I added a shimmering blue ribbon around each chunk of ice which not only gave it the feel of a gift, but allowed me a way to attach a little wooden hammer to the gift. Those hammers were, in fact, crab mallets. I used a wood burner to burn each niece’s and nephew’s name onto a mallet. And so the mallets served two purposes: they were the name tags for the gift and the tools that were used to open them. And as I kept the ice thickness relatively low, they worked great for cracking away the ice. I spread a blanket on the floor to capture the ice chips and everyone sat atop the blanket as they hammered away.
Check out my gift wrapping from previous years!