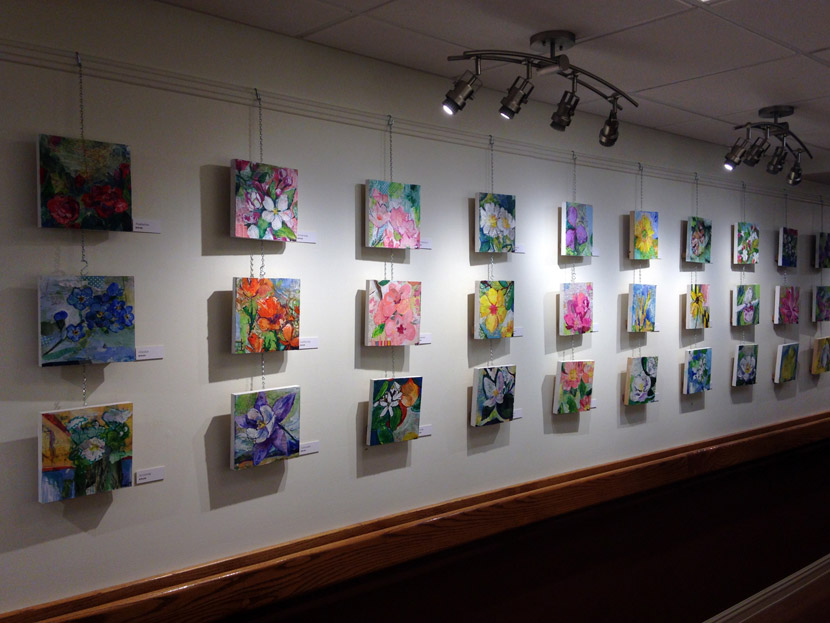
Over the years I’ve assisted my wife in hanging her artwork in quite a few spaces—everywhere from galleries to coffeeshops to offices. Last week we tackled hanging artwork in the hallway of a retirement community, and the hallway made use of the ubiquitous track system.
The track system is very convenient, especially for spaces that rotate featured artists on a regular basis. It requires little upkeep between shows and no nails disfigure the walls. For that reason they are very popular. If I had a public space for displaying artwork, it’s very likely I would use a track system. However, there are disadvantages:
- While the track itself is not intrusive (and can even be disguised as molding), there is a rod, cord, or chain hanging down off the track to each piece of artwork. And while that’s not a terrible visual, neither is it as clean as a canvas hanging on a nail.
- The system is not flexible for non-standard arrangements. This is especially true when stacking non-centered artwork. It’s doable via multiple rods, but then things truly start looking messy.
- Finally, with the rod or cord behind the artwork, the artwork is no longer tight against the wall. Even with rods that bend back against the wall after clearing the track, the thickness of the rod itself keeps the artwork from setting tight against the wall. This is most problematic when the rod extends down below the artwork (necessary when stacking items).
This last issue is the problem I’d like to discuss as it can be a significant problem, especially when you’re hanging small pieces of artwork.
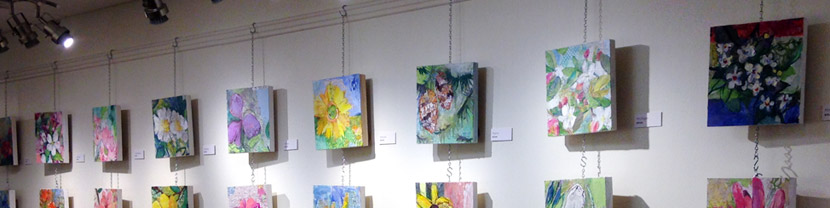
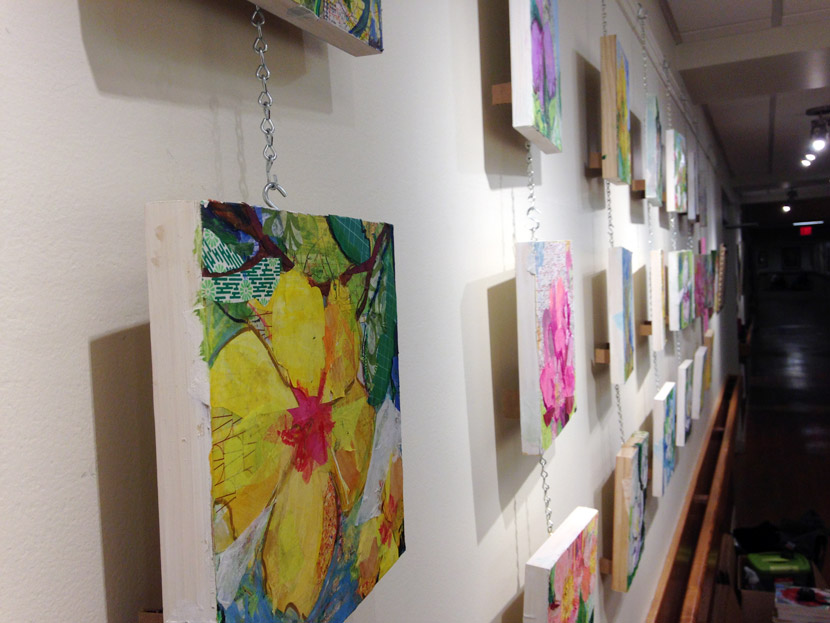
In my case there were chains hanging down from the track and they stuck out from the wall about two inches. I was hanging my wife’s Stately Garden collection—fifty 8″ x 8″ cradled boards, with three boards stack on each chain. But when hung, the boards did not touch the wall at all. This caused them to rotate freely to the left and right. And as the hallway was near the main entrance, the panels would move with the breeze. It looked terrible.
I tried a number of quick remedies, but it became clear the only fix to this problem would involve anchoring the bottom corner of each panel to the wall. Here was my solution:
- I collected the sheets of cardboard we had placed between framed items during transport and cut one-inch strips.
- I then calculated on average how far the bottom of each panel extended from the wall. It was around two inches (measured from the wall to the front of the board).
- Next I measured the inside (inset) area of the back of the board. It was around six inches. (NOTE! Even if you buy a batch of cradled boards from the same manufacturer, this measurement can vary.)
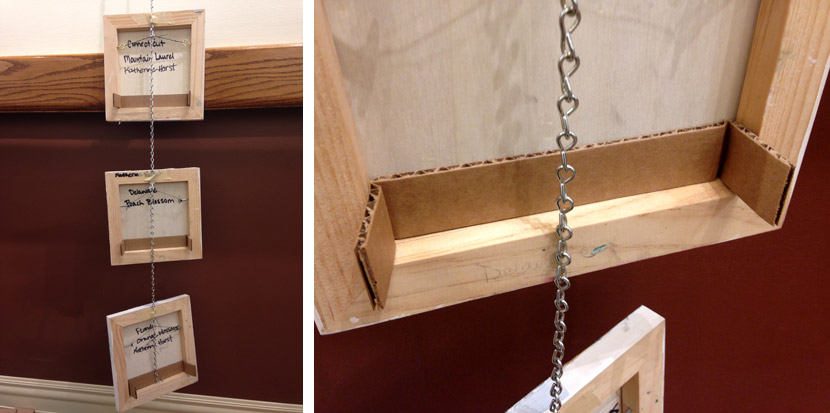
- On each strip of cardboard I measured two inches, followed by six inches, followed by two more inches, then cut off any extra.
- I bent the cardboard inward at both two-inch marks. I was left with a strip of cardboard that fit snugly within the back of the cradled board, with each end sticking straight out from the back. When hung, those two ends of cardboard rested against the wall, keeping the artwork parallel to the wall and preventing it from moving around.
Now keep in mind that whatever you use to prop the back of your artwork will be seen when viewed from the side. I was in a time crunch and had to use what was available. And while cardboard would not be my first choice, it did not look bad and was definitely preferable to the alternative of artwork swaying in the breeze.
An alternate solution is to lightly glue short pieces of wooden dowel rods into the bottom corner of each piece. Translucent plastic dowels may look even nicer. If you’re hanging a traditional framed item (without a cradle), the task will be a bit more difficult as you’ll have to attach your prop of choice to the back of the frame. For instance the same cardboard method described above could work—but you would have to tape it to the back of the frame.


You are amazing.
What a great idea! Now tell that wife to paint the canvas edges in the future. I personally use gray right from the tube. Looks great. If she paints in oil, she can use acrylic regardless for the edge work which dries quickly and looks amazing.
Oh, absolutely! She does paint the edges, but she was in a hurry to get this series ready in time, so the finished edges came later. I’m with you! Thanks for the comment, Jeanne.
Thank you for that wonderful idea Jason. I am currently faced with the same issue!
Thanks a great help. Jeanne Forsythe what colour grey do you use to pain the edges. I know the right shde really helps the painting to pop
Hi. Hope someone is still around. Curious what type of tape was used? I couldnt really tell via the picture. Going to try to to the same type of system for an art show for the weekend coming up, but the paintings are a tiny bit larger, but curious what tape that was? thanks
Hi David. The cardboard I used was wedged into the back of the cradled board so that no tape was necessary. (Plus the weight of each piece pushing back against the wall also helped keep the cardboard in place.) Is that what you’re referring to?