Half a year ago my wife and I celebrated our second anniversary by driving from Pennsylvania to Utah and back. We had plenty of time to talk, dream and plan. And our biggest plan was to totally rework her art studio space. The main piece would be a large table. She is a collage artist and works mainly on flat surfaces rather than easels. But beyond that, she wanted a collaboration space where other artists could work with her side by side.
Money was definitely an issue, so I went the pallet wood route. (Please note that there are health concerns with certain pallets. Research this before getting started and take the necessary precautions!) I pleaded for pallets on Facebook and within a few days was driving home with about ten of them in the back of my truck. What follows is an overview of how the table was created. Note that this can be done with a minimal set of tools! A table saw would be a huge help. But if you’re without one (like I am), a large helping of patience can take its place. I had a standard circular saw, an electric drill, a plane and a belt sander that I borrowed from my father.
Step 1: Disassemble the Pallets
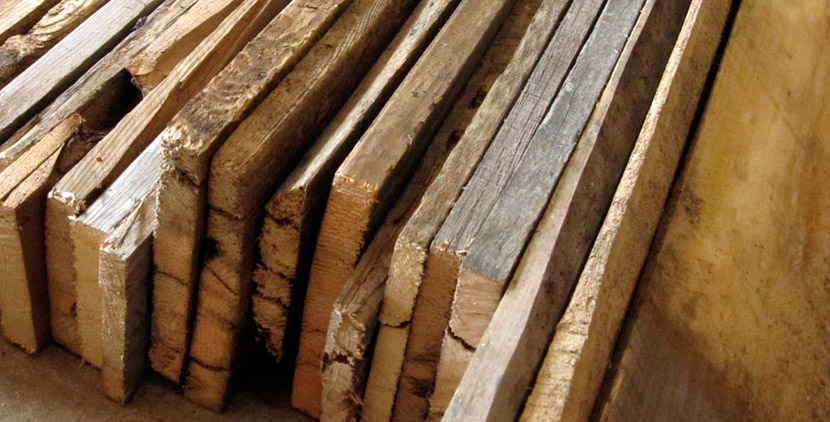
Break the pallets apart into usable pieces. This means no splitting or nails. Pallets do not separate easily. The first couple I took apart using a hammer and crowbar. It worked, but it took way too long. I then decided to use my circular saw to cut each pallet slat on both ends to separate them from their outer supports. With both ends free I was able to twist the piece back and forth until the nails separated from the middle support. Even this was cumbersome. And of course some pallets have two inner supports. Keep the crowbar handy. (Ideally you would want a tool that can cut right through nails and then simply tap the nails out of the wood from the cut end.) This was the most time-intensive part of the project.
Step 2: Know your Dimensions
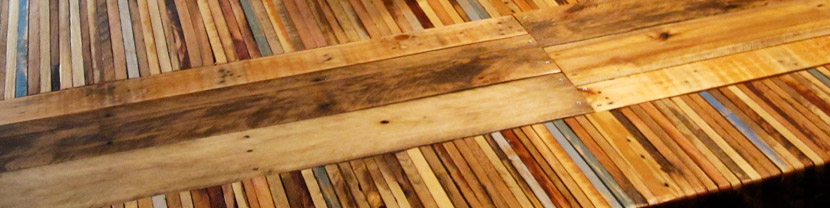
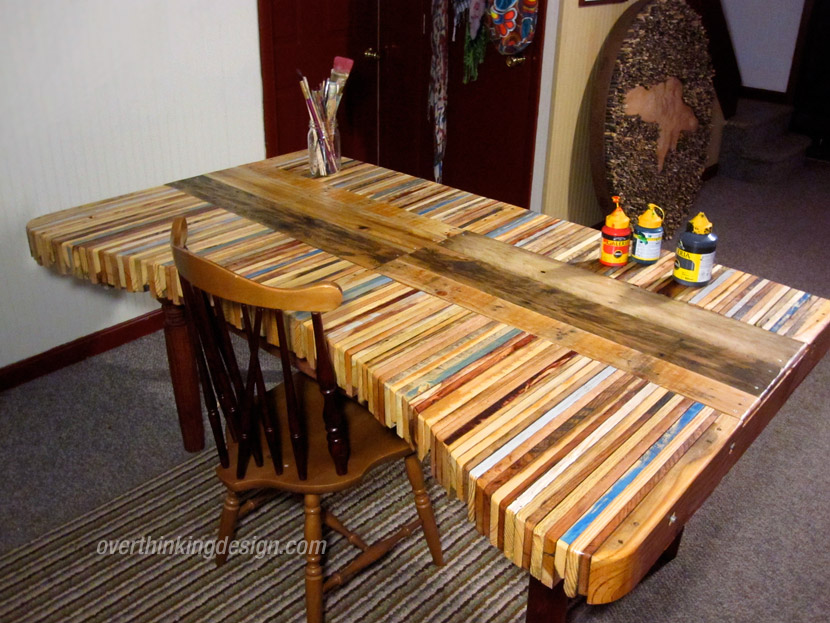
Decide on the size of your table top. Mine is 6 feet wide and 3.5 feet deep. Look at the photo of the finished piece at the top of this page. You’ll see it’s divided into three parts: the top vertical pieces, the middle flat boards, and the bottom vertical pieces. I’ll simply refer to these sections as top, middle and bottom. To finalize the size of each section, it’s important to start with the middle one. Find some of the nicest boards you were able to glean from your pallets, and make sure you have matching pairs. I used three matching pairs, each with a different width. When one board from each of those pairs is placed side by side, measure the total width. Mine came to 14 inches. With a total table top depth of 42 inches, that left me with 28 inches for the top and bottom. I assigned 10 inches to the top and 18 inches to the bottom. (No need to be too symmetrical!)
Step 3: Set Limits on Height
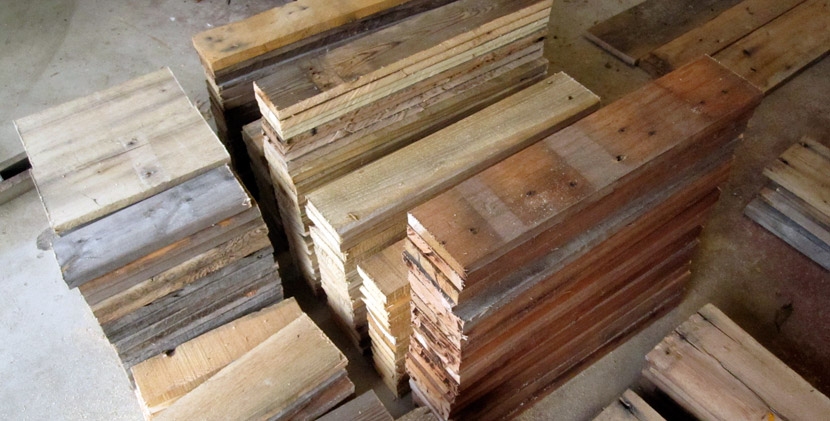
Set aside your middle boards. All other boards should be cut into lengths of 10 or 18 inches (or whatever you decide for your top and bottom). Cut enough to cover the planned with of your table. Decide upon a maximum and minimum height for each piece. The minimum is important because each piece will need to support the drilling of two fairly large holes and this is difficult when there’s little height with which to work. The maximum is important because you don’t want to end up with one or two pieces that are extra long sticking down below your table. Let’s say your maximum height is 5 inches. Make sure you have a good number of pieces that are exactly 5 inches. This will help your table to set evenly even though many pieces are shorter than 5 inches.
Step 4: Prepare Three Main Supports
You will also need three thicker pieces for main supports: one in the middle and one on each side. The tops of these supports are going to be part of your table top. So you’ll need to plan ahead for your middle section. The boards will need to be sunk into these main supports. Do some careful measuring and cut a section out of each support that matches the height of your middle boards. I did this with the help of a circular saw and a hand saw. Without the right tools this part can be a bit clumsy to complete. That’s OK! Just be safe!
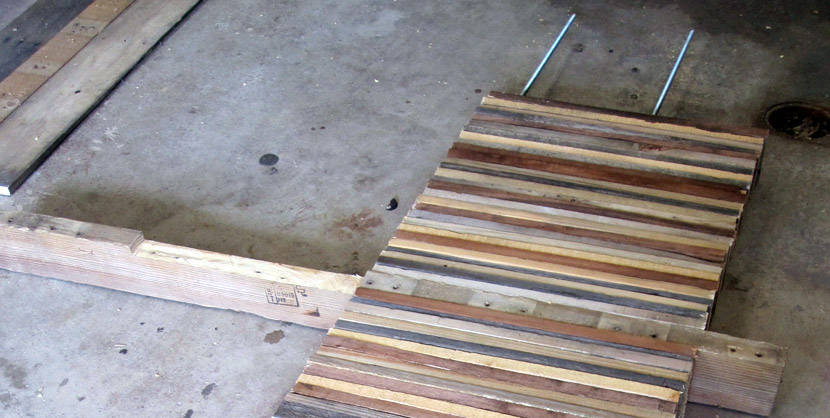
Step 5: Pick the Best Threaded Rods
I didn’t bother with sanding each individual piece, although you absolutely could. The tops will be planed down and sanded later. To keep the vertical pieces together we’re going to fit all of them onto threaded rods—two rods per section. (No rods are necessary for the middle section.) The rods need to be at least as long as the planned width of your table. You’ll also need nuts to fit each end. I used 3/8″ rods. The thicker the rod, the less flexible—and you don’t want your table flexing more than necessary. I recommend going at least that thick—possibly more.
Step 6: Prepare Two Jigs
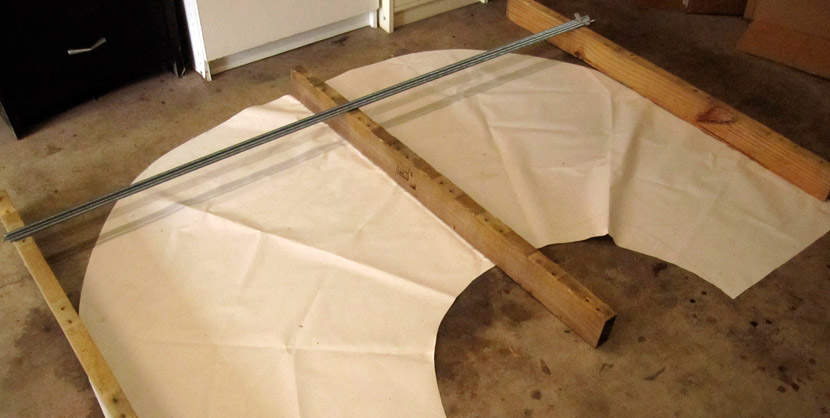
Here is where a drill press would come in handy. You don’t have one? Neither did I. I took one piece from the top and one from the bottom and used them as jigs. I marked where I wanted the two drill holes and I hammered a large nail at the center of each drill location. Hammer the nail until a small portion of the tip sticks through the other end. This is your jig. Place it on top of another piece, aligning to the end that’s going to be butted up against the middle section of your table. Also align the top edges (the sides that are going to be the actual table top surface). Once aligned, simply tap each nail so it leaves a mark in the bottom piece. This is where you need to drill. If you plan on cutting a curve into the bottom section as I did, make sure your hole positions aren’t going to get in the way. Obviously you won’t be able to cut your curve through one of your threaded rods. As you can see in the photo, I had to drill up higher for my lower hole so that I could cut my curve without worries.
Step 7: Start Drilling!
Drilling with a hand-held drill is difficult, but possible. First, make sure you have a drill bit that matches the size of your threaded rod. You want your pallet pieces to fit snugly onto the rods. When drilling, you’ll find that the head can jump a bit when you pull the trigger. All I can say is be as steady as possible. Despite minor jumps, I didn’t have any pieces that didn’t fit on the rods because of this issue. You’ll also need to drill through your three main supports. Use your same jig for this, but measure from the edge of where the middle section starts.
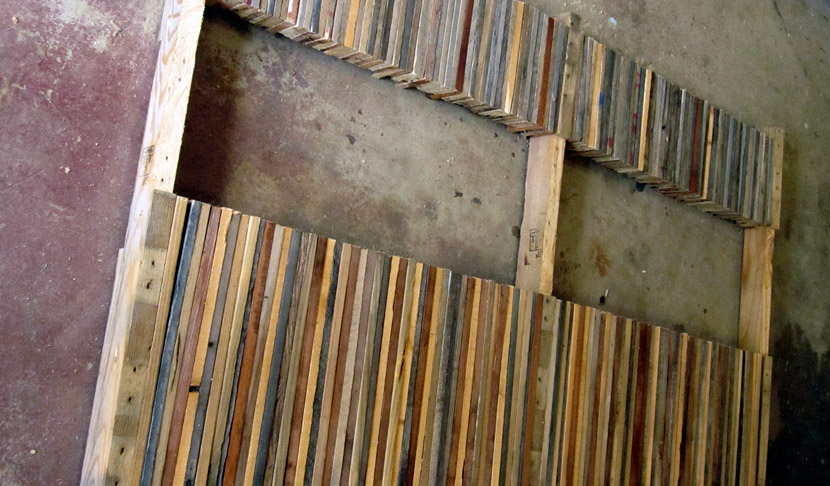
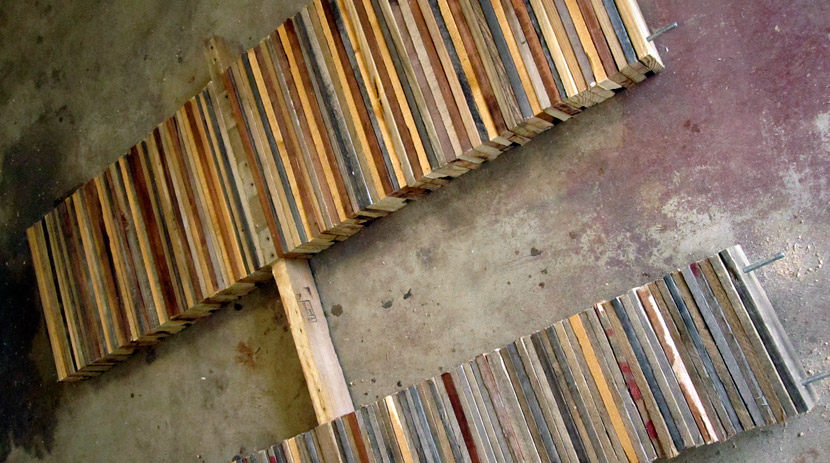
Step 8: Assemble Top and Bottom Sections
Now comes the fun part—assembly! Insert the threaded rods through the middle support. The support should be positioned at the exact center of the rods. Start inserting your pallet pieces onto the rods. Alternate sides rather than completing one side at a time. After you have about eight on a side, use a hammer to occasionally tap the pieces together toward the center. You’ll tighten everything with a nut later, but do all you can to keep them tight from the start. Sand away any splinters that may have resulted from drilling before assembling. When all pieces are in place (top and bottom), it’s time to put on the end supports. You’ll need a little piece of each rod sticking through. If that’s not the case, remove enough pallet pieces until they do. I’ll also encourage you to create an inset area for each of the nuts. Again, there are tools that do this job easily. I simply used a gouge from a wood carving kit. Whatever tool you use, cut an area large enough that will allow your nut to be inset and will allow your ratchet to fit over the nut. You can then proceed with threading nuts onto each of the rods and tightening everything up. Trim off any excess rod lengths.
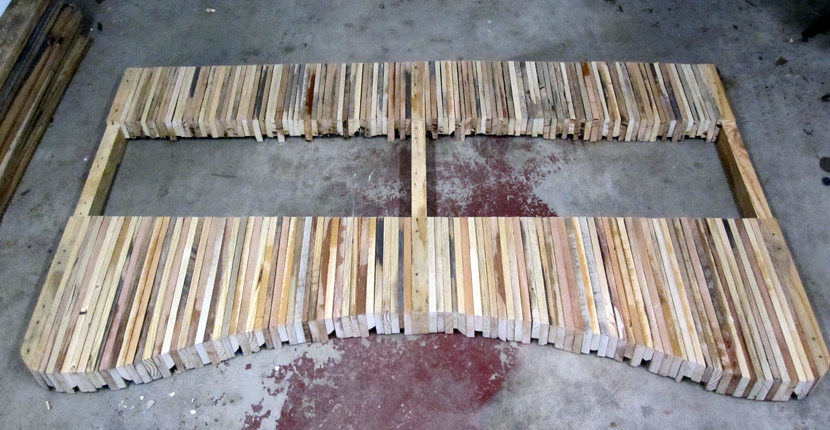
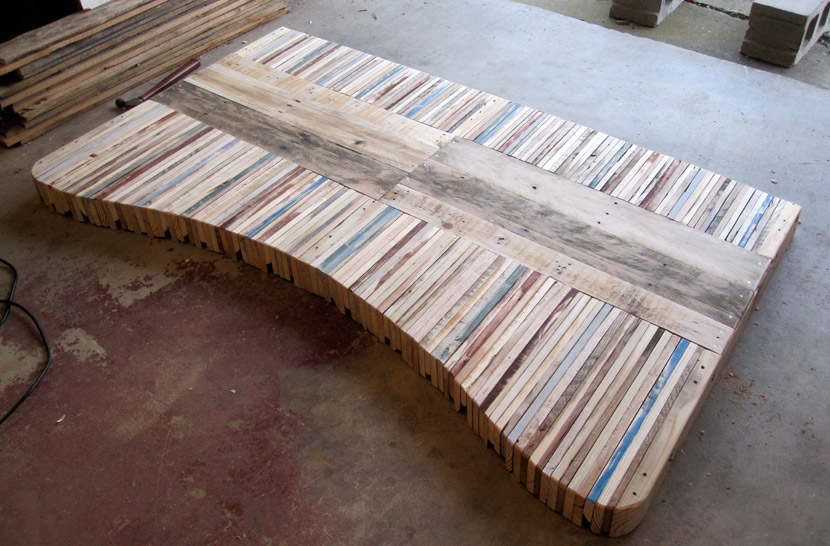
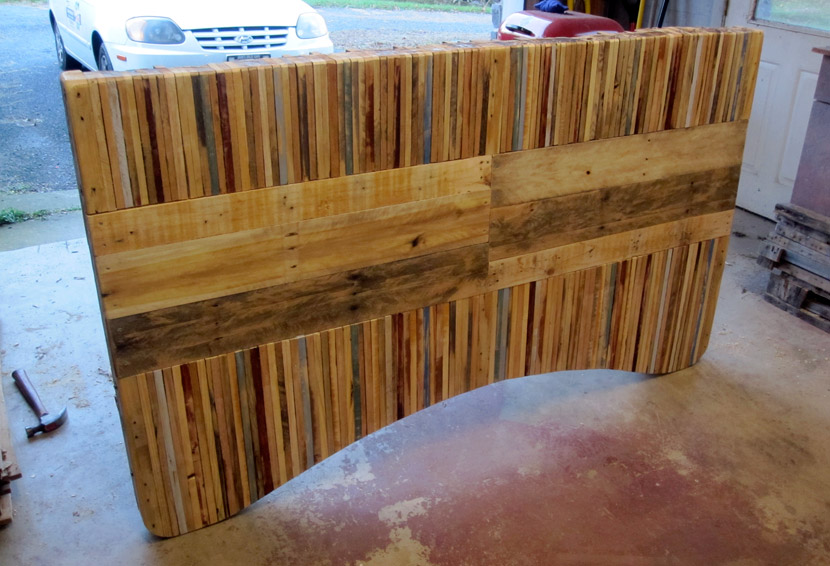
Step 9: Cut the Curve (Optional)
This next step is optional, but really adds a nice touch of style. I drew a curve onto the middle of the bottom section and cut it out. Not only does it add a nice visual element, but it also lets the person using the desk better reach the far corners. (It’s a large desk.) At my center support—the highest point of the curve—the cut was six inches high. If you have some kind of tool that can cut this while the table top is assembled, great. Go for it. I experimented with a cheap jigsaw. The blade wasn’t long enough, but even if it had been, I found it splintered the wood and that’s not acceptable. So after drawing in the curve, I disassembled the bottom section and cut each piece at my mark by hand. This took some time, but was totally worth it. I then reassembled the bottom portion and tightened everything.
Step 10: Plane the Surface
Even if you did an amazing job with your drilling jig, you’ll see uneven areas in your surface. Now is the time to break out your plane and go to town on the surface, getting it as even and as smooth as possible.
Step 11: Attach Middle Boards
Time to tackle that middle section. Take your three pairs of boards, sand them down and lay in each set in on either side of the center support so that they share the center support. I chose not to match the pairs up side by side, but a paired placement would work as well. I found I needed to cut the ends that meet in the middle as they weren’t perfectly square. Once the middle ends are all butted up against each other and squared off, mark your cuts for the outer edges and trim those as well. You now need to make sure these boards are even with the surface of the rest of the table. Mine were too high, so I used a chisel to take off some of the height from the bottom of the boards where the they rested on the supports. Eventually everything was even and I screwed the boards into place.
Step 12: Round the Edges
A very nice visual and practical touch that you will not want to skip is the rounding of the edges. I simply used my plane to achieve a basic rounding. Follow this with some rigorous sanding. I had a belt sander, but it can be done by hand. I again experimented with using a jigsaw to help with the rounding, but the splintering was unacceptable.
Step 13: Add Subtle Color
Most of the color you see in my finished table is natural. However, I did go in and stain a few pieces and painted a few pieces various shades of blue with acrylic paint. The whole thing was then sanded down to smooth the table top and distress these color additions. I chose to make my color additions match on both top and bottom sections. This gives the illusion that the boards run the entire length of the table.
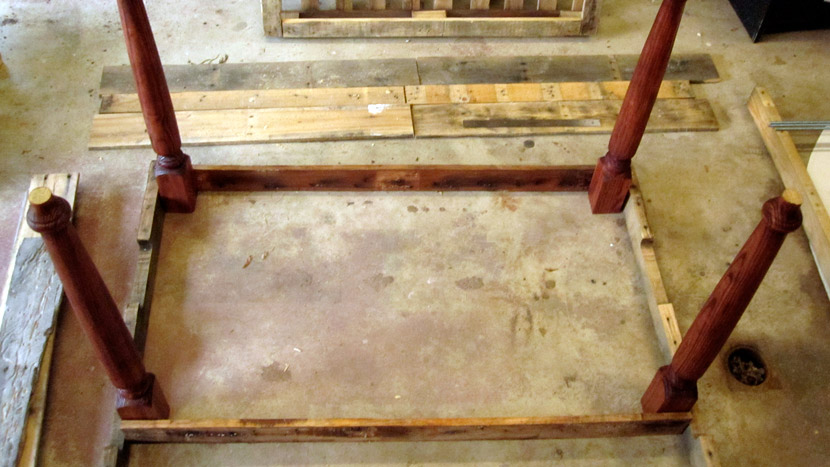
Step 14: Build the Frame/Legs
The lower frame was also built with pallet wood. The legs themselves were bought from Home Depot and are the only non-pallet part of the table. I won’t go into detail of the frame itself as it’s nothing fancy and there are better ways to do it than I did. I’ll only mention the one unique thing I did which worked well. On the underside of the table top I chiseled out four square holes to match up with my four table legs. This allows the top can to rest securely on the base without being attached. This is important as it is a large table and would be difficult (and maybe impossible) to get through doorways if the legs were attached.
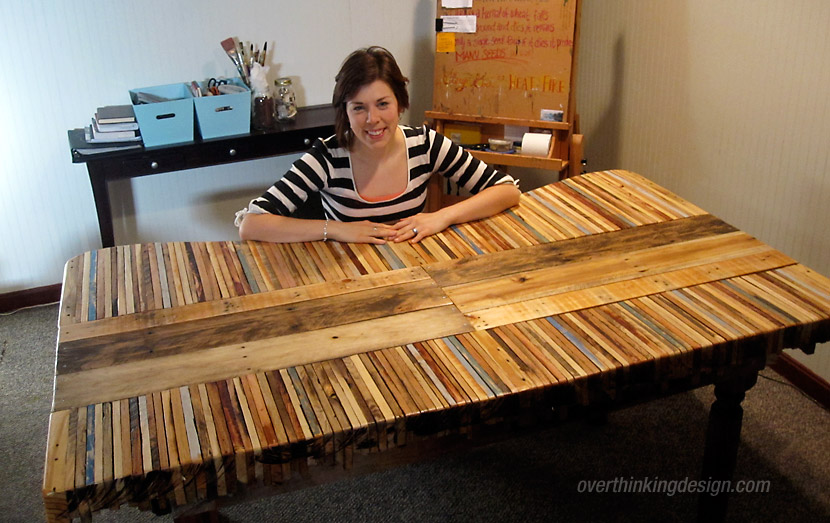
Step 15: Polyurethane
A couple coats of satin finish polyurethane to protect and bring out the color and… done! Kate has a table for her art studio!
If you end up creating a piece based on this table, please let me know. I’d love to see it! And my methods can definitely be improved. I’m not a master carpenter—I figured it out as I went along. Improvise and have fun!


Incredible, very impressed! Nice work!
Nicely done. We live up the susquehanna a bit from you in lancaster and are working on remodeling a house using trash and natural materials. We had this idea for doing our kitchen counters. Now I’m much more inspired seeing it already done. thanks!
Fantastic idea for counter tops!!!!!
Beautiful design – thanks for sharing!
Very informative article. Provide accurate dimensions to make the pallets with correct size of tables and furniture.
The top is 6′ x 3.5′. The base is approximately 4.5′ x 2.5′. And the total height is 31″. But of course the concept can be applied to pretty much any size.
Beautiful table!!!!!!!! I have become obsessed with pallet art!
I had planned to make a desk top using 2 large wood slabs joined to make the top and have two desk bases from my Mom’s old sewing table. Now I’m going to make the desk top using pallet slats! Instead of using the threaded rods through the sections, I will most likely plan to glue and clamp each piece to the next. Nice job!!
Cool! Yeah, I would think that as long as it’s on a solid base, glue should work just fine. Definitely less work than dealing with the rods!
Hi Michael,
I too am embarking on this type of project, but considering glue & clamp verses drilled holes for rebar/rods. Would you provide feedback on how the process went for you? How satisfied are you with the finished product?
And Jason,
I have a lot of nice pallet slats, and I have worked diligently to disassemble them. However very few of the slats measure 5 inches in width. Am I correct to assume that 4.5-5 inch height is nearly necessary for drilling of holes & insertion of rods?
Beth, you can definitely use slats that are less than five inches high. I would think that if your slats are in good condition, they could be as small as two inches—maybe less depending on the size of the hole you’re drilling.
I did have someone else use the glue/clamp method and they had issues with it coming apart during the building process—though they worked through those issues and it looked great. As long as it’s constantly being supported by a sturdy base, I don’t see why that method couldn’t work just fine.
Send a photo when it’s complete!
What a fabulous idea. I run a very small business using pallet wood and throw a lot of scrap pieces away. But after seeing your table its given me plenty of ideas. Great job mate.
Kelvin . uk.
Thanks, Kelvin! Would love to see what you come up with.
I love your table great way to use pallets. I have been building things out of pallets also and always looking for new idea’s. I have started a small table using pallets in this way but on a smaller scale. But I love the artistic flow of this table!! Thank you for sharing !!
Thanks so much, Michelle! Glad to hear you’re working on a table in this style. Please send me a photo or two when it’s complete. I’d love to see it! Plus I would probably add it to this post: http://overthinkingdesign.com/2014/09/pallet-desk-inspires-other-pallet-furniture/
Oh, I can’t wait to try one of these! I have probably 50 pallets for creating things for my store! I love this because it looks like a quality table as opposed to some of the pallet projects I’ve seen. Might start out on a smaller scale first! Love it! Nice job and great tutorial. Thanks for the inspiration!
Thank you, Elaine. Yeah, a smaller scale is probably a good idea. This table is a beast! There are plenty of ways to simplify the steps I’ve outlined. Please share anything you end up creating!
Me gustó mucho el diseño de esta mesa, yo soy amante de trabajar con pallets, y tengo pensado hacer un comedor para mi casa aplicando su original idea, solo que le haré algunas adaptaciones, (no incluire las varillas y las patas también las haré de pallets), Mil gracias por la idea y saludos desde Medellin ( Colombia )
Thanks for the kind words, Ángel. When you end up completing your project, please share a photo of your creation!
Awesome design gonna make it but first I am making special end tables. And a coffee table first just starting out any tips you can help with.
Starting with end tables and coffee table sounds like a great idea. The same general concepts apply. Would love to see photos of your finished products!
I am planning on making a small table for a sewing machine. I would like to sink the machine a few inches so that while sewing the needle and needle plate would be level with the table. No antique base will be used just pallet for the legs. Also a pallet chair. Any suggestions?
Hi Bobby. Sounds like a cool project. Sinking the sewing machine will be a challenge if you’re using the threaded rod method. Unless you find pallets with extra wide pieces, cutting out the sunken portion probably won’t leave enough room for the rod. If you add extra cross supports along the bottom, you can have the rods go just partway across the table and stop at the sunken part. You’ll then need to build a platform for the sewing machine which you can attach to the table in any number of ways. Please send a photo when you complete the project!
My husband and I were discussing ideas for building new countertops last night and really wanted to do something with wood. I love this. We are salvage material fanatics and build alot with pallets and other construction or salvage debris (from chicken houses and fences to furniture). We often use rebar as a connector for our salvage wood, similar to how you are using the threaded rod. We have a little bit of our work shown in the blogs on our website, but we really only started documenting a couple of months ago. http://www.soggyhollow.com
Rebar sounds like it would be a good idea for many applications. The threaded rods worked fine for this table, but something sturdier wouldn’t have hurt. If you end up doing countertops in this style, please send photos!
Absolutely love it! Have been looking for a creative and unique way to make a cheap desk for my office at home… this is it or something similar. It has so much personality.
how long should it take to make a table out of pallet?
It all depends upon your experience and even more upon your tools. I did not have the appropriate tools to tackle a project like this, so it took me many days.
Great idea and great table, thanks very much mate ! I’ve made the table top in basically the same way as you suggest but there’s no inset curve and its 5’6″ by 2’6″. I used 12 mm rods and spent most of my time sanding with what I think is a great result. I’m now thinking about what sort of protective resin to add on top and how to make sure it’s nice and flat. I’ve not applied any colouring and will leave the pallet as is – I ended up using a right old mix of wood, not just pallets, that I had hanging around so have a good mix of grains, shades and widths. Photos available should you like…
Hey Simon, that’s great to hear. I would LOVE to see photos of your creation, and even feature it in my follow up article that shows tables that were modeled after mine, if you’re OK with that. Here’s that article: http://overthinkingdesign.com/2014/09/pallet-desk-inspires-other-pallet-furniture/
Thanks Jason, now I’m all finished with the table I’m ready to post. How do I get the photos and comments up to that other page ?
Cheers, Simon
Hey Simon. The other post I referred to is below. You can either post your photos to the comments section, or I would be glad to include you in the article itself if you’re willing to email me the photos and any comments you would like to include with them. I’ll email you separately about that. http://overthinkingdesign.com/2014/09/pallet-desk-inspires-other-pallet-furniture/
Hi, I was inspired by your work and will try to make a dinner table using a similar design. I have a question, something I just can’t figure out: How did you fit the legs to the top? I read that you chiesseled four cavities for the leg’s top side to fit but I can’t see how the side parts of the bottom fit the table top, as it is uneven. Thanks for the inspiration, Z from Argentina.
Hi Ezequiel. Yes, you have it right. The bottom of my table is uneven and I chiseled out square notches for the legs. Due to the unevenness, I simply placed the sidebars a couple inches lower down the legs. They’re not actually flush with the top of the legs. And that seemed to work just fine. Would love to see photos of your dinner table when it’s complete!
I am about to start a side table, followed by a coffee table using a similar method! Why not just screw each piece to the previous one! As long as you countersink the holes – no problem! Yeah, OK it is screw intensive but they are dead cheap and this is pallet wood so no pilot holes necessary!
Hey Johnny. Great question. Interesting question. Honestly, I think that method would be fine for a small side table. But I don’t think it would provide the ideal strength for a full-sized table that has to span a significant amount of space. Would it hold together? Sure. Would it be usable? I think so. Would it bow? Probably. And I don’t think I’d trust putting anything of significant weight on it. If you’re using pieces as thin as mine, there’s not a lot of length for the screw to use. You may want to screw more than two pieces together at a time. Maybe I’m wrong. But again, for a side table, you’ll probably be OK. I’d add one piece at a time and screw through multiple pieces each time, developing a placement pattern so I don’t screw into past screws I can no longer see. Best wishes and please let me know how it goes!
Maravillosa idea, alguien tendrá la amabilidad de diseñar un croquis en centímetros, saludos y feliz año.
Thank you very much, José! I wouldn’t get too hung up on the exact measurements. Pick some dimensions that work best for how and where your table is going to be used. (If you would like to use my exact dimensions, Google is what I use to convert between inches and centimeters.)
I really enjoyed reading your explanations for this project. Very informative and a wonderful piece. Thank you for sharing.
[…] This handsome desk design looks like a piano and is made of stacked pallet slats. Add the threaded rods straight through the stacked pallet slats to build this one-of-a-kind and robust wooden desk in no time. The whole desktops are supported with 3 main wooden supports and finish the final stacked wooden desktop with durable stylish legs. overthinking […]
[…] with plenty of space to get your creative juices flowing. The instructions are available over at OverthinkingDesign, so head on over if this is the kind of desk that fits what you’re looking […]