For the past ten years I’ve invested extra time into wrapping Christmas gifts for my family. Gift wrapping is an interesting tradition. It’s pure decoration. And it’s an activity that gets even the most non-artistic person to physically participate in the artistic process. Yes, there’s a secondary goal of hiding the gift inside, but the primary goal is to make something pretty.
And for those who enjoy exercising their creativity, what an open door gift wrapping is! My tradition started out innocently enough. In 2007 I got a bit crafty with potato stamps and created a theme for all of my gift wrapping. In subsequent years it slowly turned more artsy (and was sometimes downright weird). It’s fun for me and it’s fun for the family. (Plus, if the packaging is fun, just maybe it will distract from the cheapness of the gift inside.)
So here they are, beginning with the most recent Christmas. Enjoy! Feel free to steal any of these ideas. Or better yet, come up with something amazing on your own and share your creation in the comments section below.
2016: Stained glass windows

For the tenth anniversary of creating themed wrapping, I wanted to do something special—and that something special involved wrapping the gifts in light. Using mat board, tissue paper, and custom-shaped cardboard boxes, I essentially built tiny churches to house each present. Add in a couple LED lights on the inside, and the packages shone brightly! Read more about the process of making faux stained glass windows.
2015: Iconic Star Wars characters
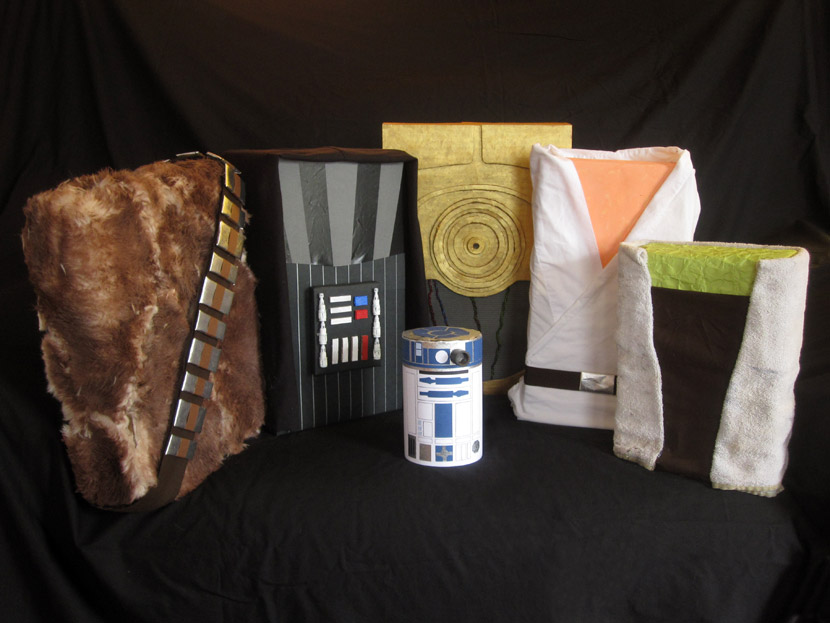
The end of 2015 brought with it the release of Disney’s first Star Wars movie. Star Wars buzz was everywhere. I decided to embrace this cultural monstrosity and go with a more commercial design this time around. Six of the classic Star Wars figures are represented in this fun set of gifts. Read more about the making of these Christmas gift packages.
2014: Animal prints cut out of boxes
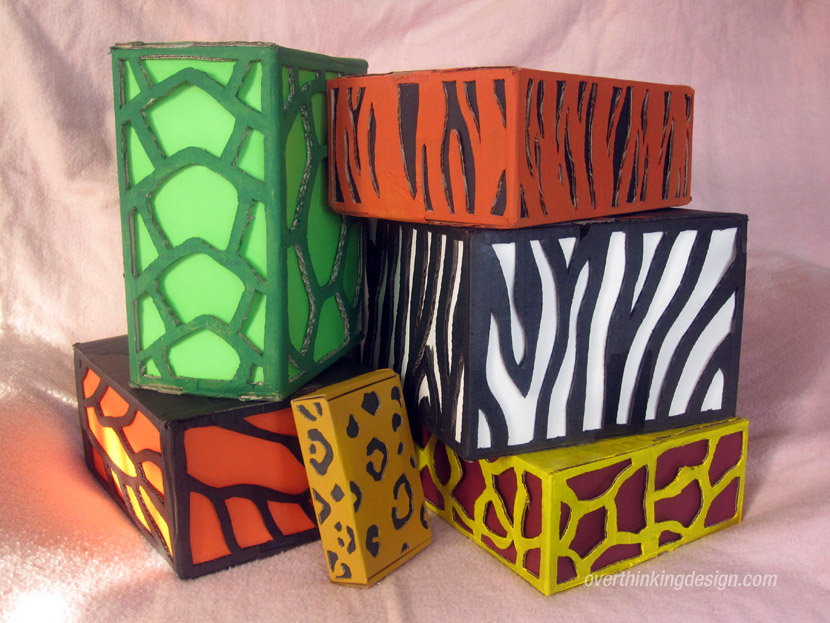
Bold, bright colors make a big impact, and that’s what we have with these animal print gifts. There’s no wrapping paper involved. You simply cut your pattern out of cardboard boxes, paint the boxes, and then tape colored paper to the inside. My nephews and nieces enjoyed figuring out what animal each pattern belonged to. (I went with the zebra, butterfly, tiger, giraffe, turtle, and leopard.) Plus they enjoyed guessing who got which gift. Read more about how these gift boxes were made.
2013: Gifts that look like books
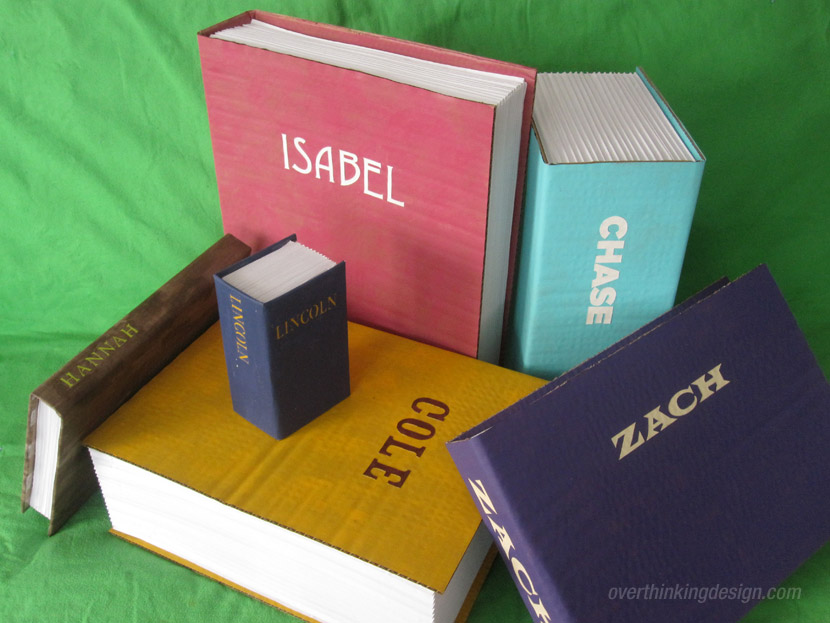
The challenge here was creating tight accordion folds on long pieces of paper. I used a metal ruler with a cork backing. Marking off ticks every centimeter on either side of the paper, I’d fold one side, turn the paper over and fold the other side. And so on. The paper plus the cardboard covers were simply glued to the enclosed box. At the corners, I interlocked the accordioned ends and that prevented any gaping. I used the recipients’ names as the titles of the books on both the front cover and the spine. These were typeset on a computer, printed, cut out with an X-Acto knife, painted and then glued into position. The finished project looks fairly simple, but don’t be deceived. This process takes time. The fun part was watching the children trying to figure out how to open them.
2012: Going green with organic wrapping material
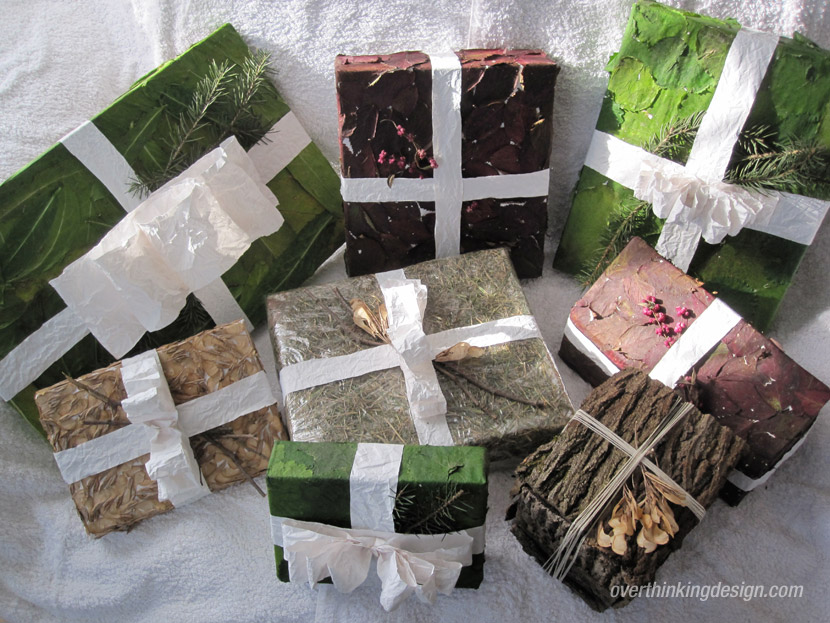
Scavenge your yard for leaves, seeds and any material you feel can be used to wrap a package. The more colorful, the better. If you live in the city, scavenge someone else’s yard or go to a nearby park. Most of these packages were wrapped in plain white paper first. The organic materials were then glued directly to the paper. With leaves, be thorough when gluing as any unglued portion will curl as it dries out. You may have guessed that these gifts created a minor mess when opened. So take into account where they will be opened before going this route. I then used accent materials like berries and pine twigs as garnishes. Get creative. Most of these were then finished off with a bow made of white paper crumpled about ten times to give it a softer feel. I always go for contrast and the white provided that. The addition of the ribbon gave these otherwise odd packages a familiar gift-wrapped feel.
2011: Textured newspaper and recycled bows

You don’t need to do it all yourself! In 2011 we had a friend who started selling these amazing bows that were handmade using recycled materials. We supported her buy buying a handfull and featuring them on our gift wrapping. The wrapping is crumpled newspaper lightly spray painted to give it a stone-type feel. Medallion name tags highlighted with gold paint were the final touch.
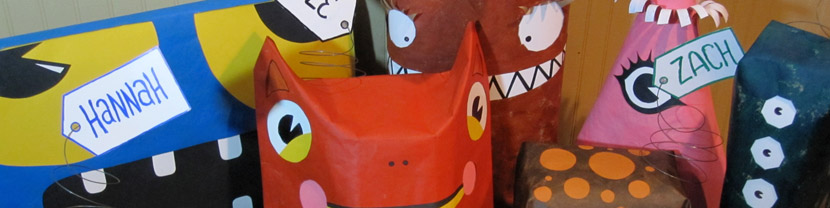
2010: Monsters!
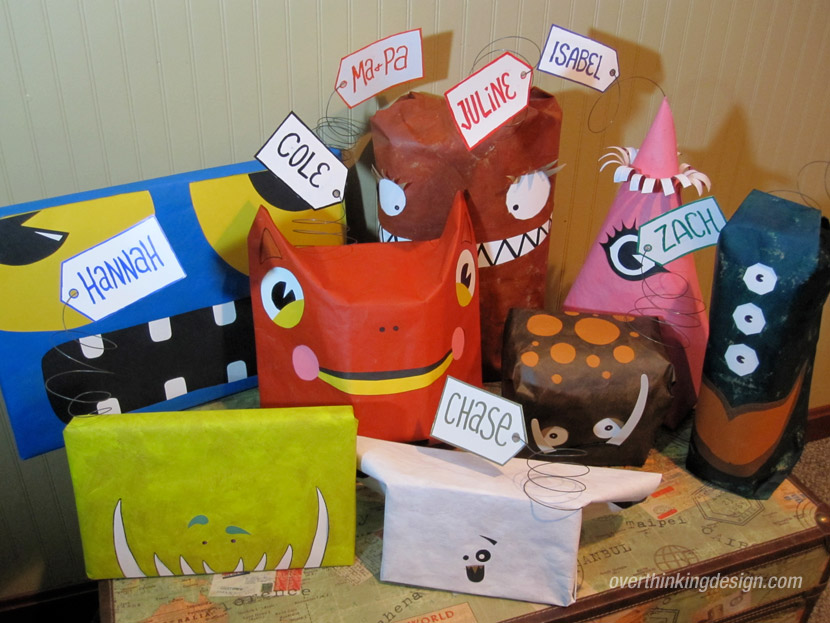
Apparently I had time on my hands in 2010. I first brainstormed by sketching a bunch of monster doodles in my art journal. I then picked out the best ones and proceeded to recreate those creature via gift wrapping. Some of the monsters are simply two-dimensional faces applied to the package. Others incorporate a bit of the third dimension. This was an opportunity to simply go nuts. The final touch was an oversized name tag attached via a springy coil of wire.
2009: Silhouettes
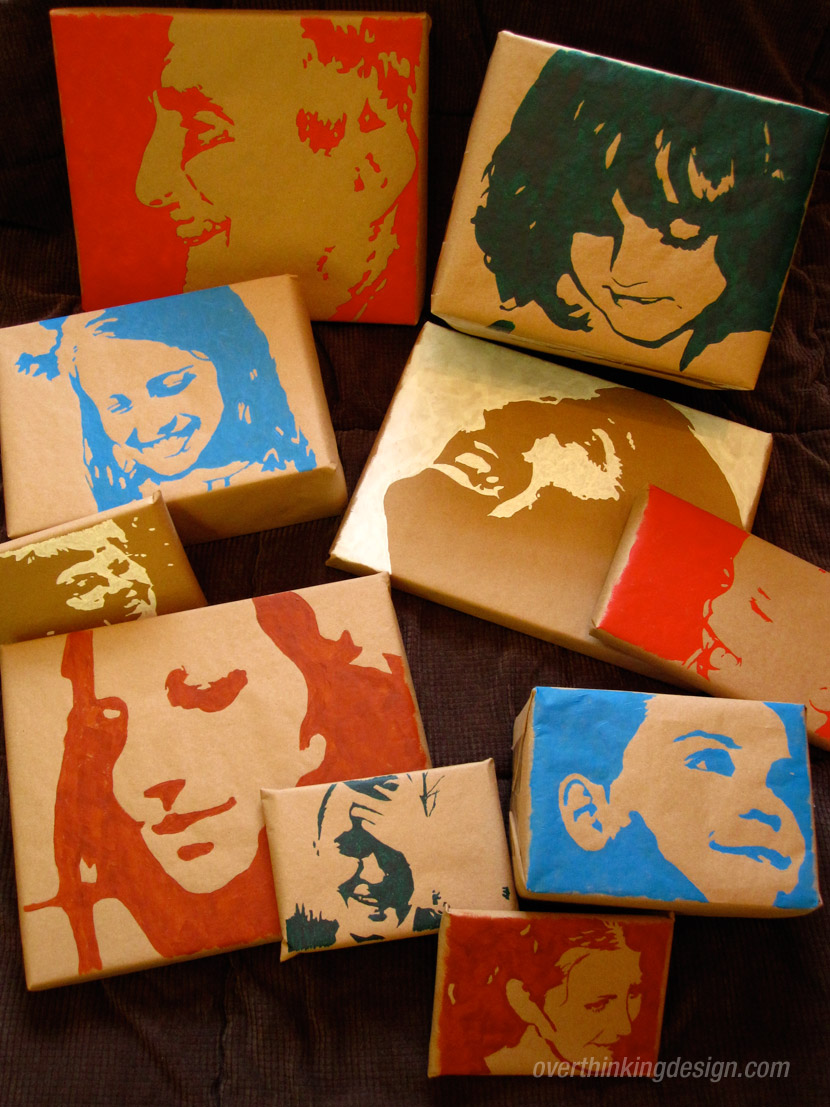
Instead of using name tags, why not simply put the person’s face directly on the package? That was the idea this year. Upon first glance you may think that you need to be an artist to do something like this. No! If you have Photoshop or a similar image editing program, you have all you need. Find a digital image of the person receiving a gift. Crop it to match the dimensions of the gift, resize it accordingly, and convert it to grayscale. And this next step is the key: posterize the image. If you’re using Photoshop, go to the Image menu, select Adjustments and then select Posterize. This allows you to limit the number of tones your image can use, and you’re going to limit it to two: black and white. If the resulting image blows out or gets too dark, you’ll need to lighten or darken your image first and then repeat the steps until you find a good middle ground. Print the image and on the back, use a pencil to fill in along all of the borders between black and white. Then lay your printout on top of the package and trace the lines. If you laid down enough graphite on the back, it will transfer to your gift. It’s then a matter of coloring within the lines. Get some acrylic paint and paint all of the black areas from your printout a single color.
2008: Packing paper and lollipops
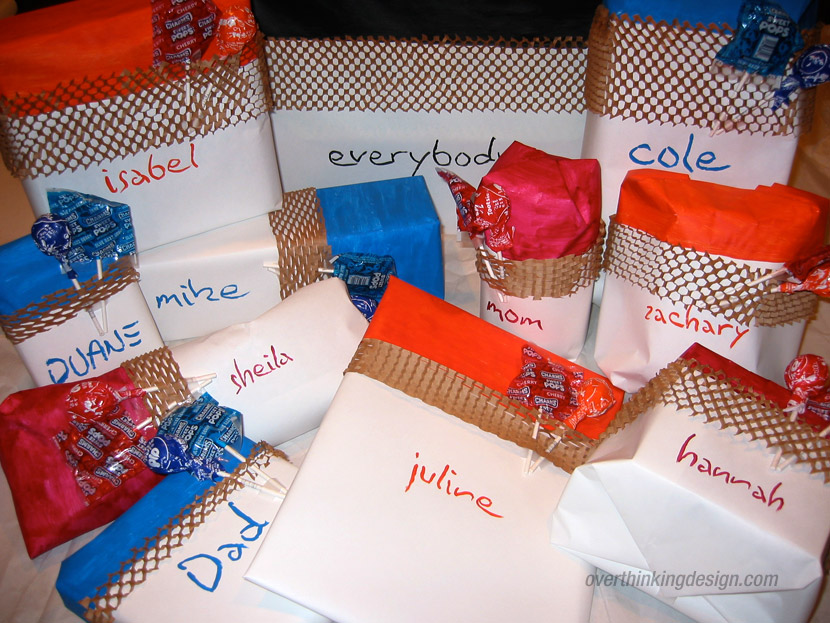
This one was simple. Recycle what you have on hand. I always keep scraps of various packaging materials for projects such as this. I painted the top (or side) section of each gift a solid color with acrylic paint and then added a strip of packaging along the border of the paint. I felt it needed a final garnish and that’s where the lollipops come in.
2007: Custom potato stamps

I was into printmaking this year and decided to apply that to my Christmas gift packaging. I created a simple potato stamp for each person, selecting an image that somehow applied to that person or referenced something that recently happened to them. From there the process was straightforward. Stamp using basic acrylic paint and tie it up with string.